Automatic TLS (SSL) Certificates
2017-04-26 by Axel Fontaine
This month CloudCaptain turned 2 and it's come a long way since its humble beginnings! In fact only since last year's anniversary we have added a lot of major new features including custom JREs, kernel tuning, live reloading, worker apps, Go and Revel support, New Relic integration, CloudWatch Logs integration, generic Linux x64 apps, custom domains and custom Elastic IPs. And that's of course on top of the countless minor features and polish which have been integrated in the 62 CloudCaptain Client updates released in the past year alone!
Today we are kicking of CloudCaptain's third year with a very highly requested new feature: automatic TLS (SSL) certificate management and renewal.
How does it work?
Load balanced apps using a custom domains can now be configured to automatically expose themselves via HTTPS with a TLS (SSL) certificate issued by the AWS Certificate Manager.
CloudCaptain configures the ELB to terminate the client-facing TLS connection with a valid TLS certificate and forward the request to your backend instances using TLS connection with a self-signed certificate.
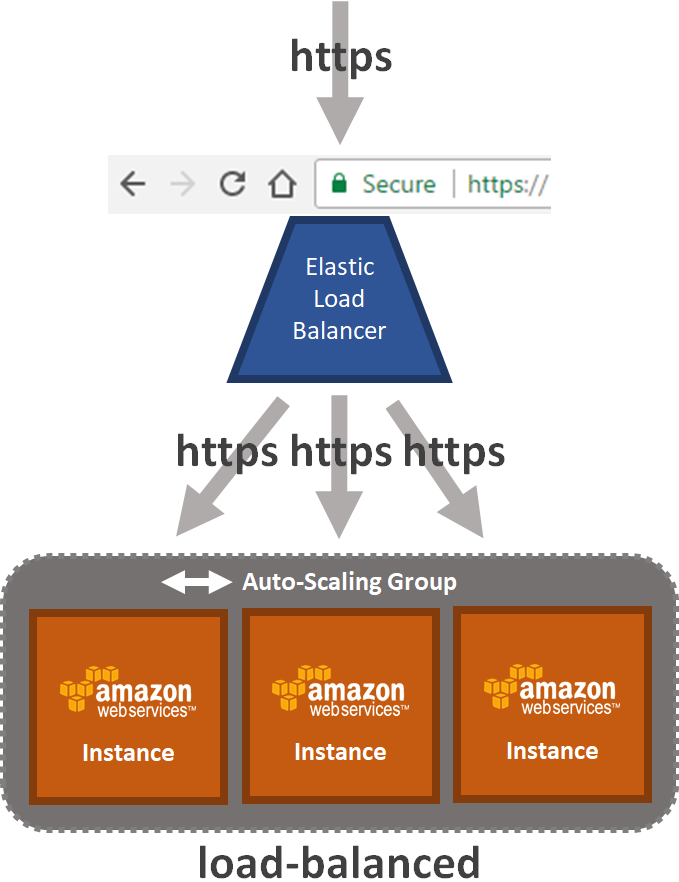
Once set up, the certificates auto-renew before they expire without any action required on your behalf. This ensures clients always see a green lock in the browser while at the same time always ensuring all data in motion travels encrypted.
Seeing it in action
Let's see what this looks like in action. For this post, we're going to deploy a Spring Boot application with HTTPS at
boot.boxfuse-example.com, which will be a new subdomain of the boxfuse-example.com domain which we own.
Obtaining our certificate
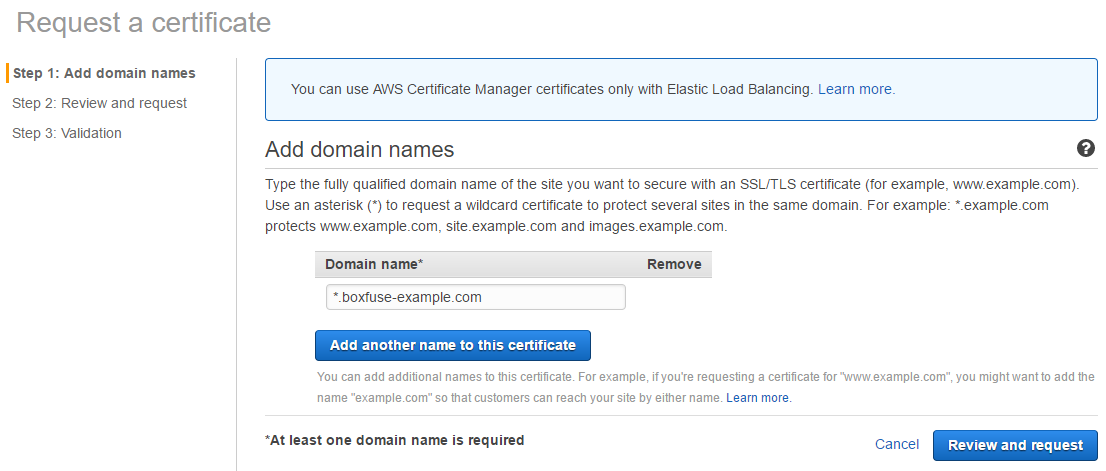
First, let's get the certificate part out of the way. To do so we're going to the AWS Certificate Manager page of the AWS Console and we request a wildcard certificate for our domain:
Once we have received the email from AWS requesting us to confirm our ownership of the domain for the certificate, we click on the approval link:
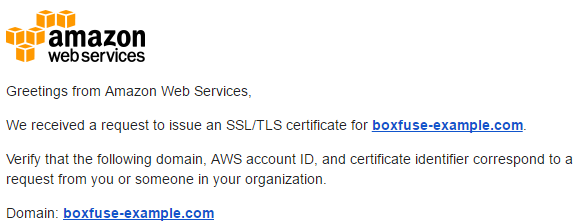
Our wildcard certificate is now ready to use.
Creating the app
We now need a basic Spring Boot app to deploy. For this we're going to generate one with the Spring Initializr and add a basic controller. To do this, we simply follow the steps described in our Spring Boot getting started guide.
Once that is done, we go ahead and build it:
> mvnw package
Running our application
All we need to do now is run our application on AWS using our new subdomain (which will be auto-created) and
our freshly created wildcard certificate. To do so we make sure the app.type, tls.type
and domain parameters are set correctly:
> boxfuse run -app.type=load-balanced -tls.type=acm -domain=boot.boxfuse-example.com -env=prod

Creating getstarted-springboot ...
Successfully created app getstarted-springboot (type: load-balanced, tls: acm, db: none, logs: cloudwatch-logs)
Fusing Image for getstarted-springboot-1.0.jar (Spring Boot) ...
Image fused in 00:03.320s (59689 K) -> axelfontaine/getstarted-springboot:1.0
Pushing axelfontaine/getstarted-springboot:1.0 ...
Verifying axelfontaine/getstarted-springboot:1.0 ...
Waiting for AWS to create an encrypted AMI for axelfontaine/getstarted-springboot:1.0 in eu-central-1 (this may take up to 50 seconds) ...
AMI created in 00:28.047s in eu-central-1 -> ami-161cc079
Creating security group boxsg-axelfontaine-prod-getstarted-springboot ...
Creating Log Stream boxfuse/prod > axelfontaine/getstarted-springboot ...
Found certificate for boot.boxfuse-example.com => arn:aws:acm:eu-central-1:103037756454:certificate/5ba59f97-5447-4b91-bb81-fa5729d80331
Creating Elastic Load Balancer for getstarted-springboot in prod ...
Creating security group boxsg-axelfontaine-prod-getstarted-springboot-1.0 ...
Creating Launch Configuration boxlc-axelfontaine-prod-getstarted-springboot-1.0 ...
Creating Auto Scaling Group boxasg-axelfontaine-prod-getstarted-springboot-1.0 ...
Waiting for Auto Scaling Group boxasg-axelfontaine-prod-getstarted-springboot-1.0 to launch 1 t2.micro Instance ...
Auto Scaling Group: i-050ff206b0370cefe [Pending]
Auto Scaling Group: i-050ff206b0370cefe [InService]
Waiting for ELB to put instances in service ...
ELB: i-050ff206b0370cefe [OutOfService] => Instance is in pending state.
ELB: i-050ff206b0370cefe [OutOfService] => Instance registration is still in progress.
ELB: i-050ff206b0370cefe [InService]
Successfully running axelfontaine/getstarted-springboot:1.0 in prod at https://boot.boxfuse-example.com/
And here is our app up and running with a valid TLS (SSL) certificate and a green lock in the browser:

And that's it! CloudCaptain automatically created and configured the AMI, the security groups, the Elastic Load Balancer, the CloudWatch Logs stream, the Auto-Scaling group and the instances and everything is fully set up and secure. And best of all, our TLS (SSL) certificate will be automatically renewed and updated before it expires without any action required on our behalf.
Available today
The CloudCaptain support for automatic TLS (SSL) certificate management and renewal for
load-balanced apps with custom domains is available today at no additional charge on all paid plans. Enjoy!
So if you haven't already, sign up for your CloudCaptain account now (simply log in with your GitHub id, it's free), start deploying your application effortlessly to AWS today and have it running online with SSL in minutes.