Live Reloading of Spring Boot Apps on AWS with DevTools
2016-07-22 by Axel Fontaine
In this post we're going to take a look at one of Spring Boot's best kept secrets: the Spring Boot DevTools.
As great as it is to test things out on your local machine, there are also clear benefits to being able to both develop and debug your application in an environment that is as similar as possible to its production environment. And that's where the Spring Boot DevTools come in. They let you live reload and remote debug your application no matter where it is running.
So let's dive in and see in 3 easy steps how you set up the Spring Boot DevTools in minutes to live reload a Spring Boot app fully automatically on AWS.
How do the Spring Boot DevTools work?
You can think of the SpringBoot DevTools as a set of components focused on boosting developer productivity.
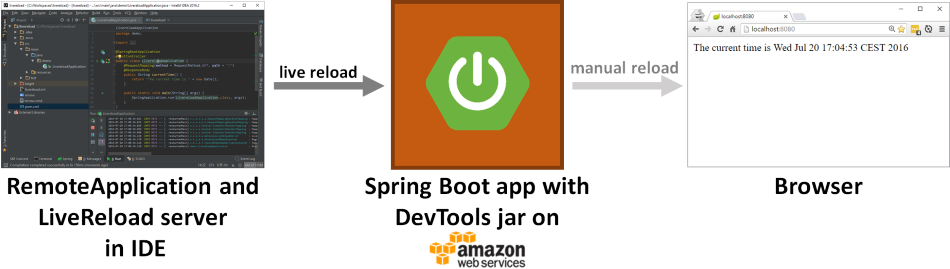
They consist of 3 major parts:
- The RemoteApplication runner that sends any changed class files and resources from your IDE to the running instance
- The DevTools jar inside your application that interacts with the RemoteApplication to live reload changes
- A LiveReload Server in your IDE that triggers the LiveReload browser plugin to automatically reload the current page

Together they provide you with super fast way to iteratively develop your application while it is running in a production-like environment.
Step 0: Settings things up
In order to demonstrate how the DevTools work, we're going to need an application to work with. Let's create one in a few easy steps.
Generating the skeleton
First we'll need the basic project structure. Head to start.spring.io and fill in the group and artifact id:

Then select both Web and DevTools dependencies and click Generate Project.
Adding a controller
For our application to do anything useful we'll need to add a controller.
Now unpack the downloaded archive and add the Controller method and annotations to the devtools-demo/src/main/java/demo/DevtoolsDemoApplication.java file:
package demo;

import org.springframework.boot.SpringApplication;
import org.springframework.boot.autoconfigure.SpringBootApplication;
import org.springframework.web.bind.annotation.RequestMapping;
import org.springframework.web.bind.annotation.RequestMethod;
import org.springframework.web.bind.annotation.ResponseBody;
import org.springframework.web.bind.annotation.RestController;

import java.util.Date;

@SpringBootApplication
@RestController
public class DevtoolsDemoApplication {
    @RequestMapping(method = RequestMethod.GET, path = "/")
    @ResponseBody
    public String currentTime() {
        return "The current time is " + new Date();
    }

	public static void main(String[] args) {
		SpringApplication.run(DevtoolsDemoApplication.class, args);
	}
}
This is just a very simple controller that will print out the current time when it receives an HTTP GET request at /.
Setting the remote secret
In order for your application to ensure only authorized users trigger live reloading you must also set the remote secret in devtools-demo/src/main/resources/application.properties:
spring.devtools.remote.secret=mysecret
Building the application
Now that we have a controller and a secret set up, it is time to build the application.
First set the version to 0.0.1 in devtools-demo/pom.xml:
<version>0.0.1</version>
And ensure the Spring Boot Dev Tools are enabled in the final artifact by setting the excludeDevtools flag of the Spring Boot Maven plugin to false:
<plugin>
    <groupId>org.springframework.boot</groupId>
    <artifactId>spring-boot-maven-plugin</artifactId>
    <configuration>
        <excludeDevtools>false</excludeDevtools>
    </configuration>
</plugin>
Then open a terminal window and navigate to the
directory where you extracted the archive. Go inside the newly created devtools-demo directory and
invoke Maven to create an executable jar:
devtools-demo> mvnw package
After a few seconds you will then have a devtools-demo-0.0.1.jar file inside the target directory.
Step 1: Deploying the application to AWS
Now that we have things set up, it is time to deploy the application to AWS. Feel free to use the tool of your choice.
If you choose to use CloudCaptain all you need to do is literally:
devtools-demo> boxfuse run -env=test
And everything will be set up, configured and secured automatically for you:
Creating devtools-demo ...
Mapping devtoolsdemo-dev-myuser.boxfuse.io to 127.0.0.1 ...
Created App devtools-demo (single-instance / none)
Fusing Image for devtools-demo-0.0.1.jar ...
Image fused in 00:04.168s (56336 K) -> myuser/devtools-demo:0.0.1
Pushing myuser/devtools-demo:0.0.1 ...
Verifying myuser/devtools-demo:0.0.1 ...
Waiting for AWS to create an AMI for myuser/devtools-demo:0.0.1 in eu-central-1 (this may take up to 50 seconds) ...
AMI created in 00:31.724s in eu-central-1 -> ami-ed936782
Creating Elastic IP ...
Mapping devtoolsdemo-myuser.boxfuse.io to 52.59.61.93 ...
Creating security group boxsg-myuser-devtools-demo-0.0.1 ...
Launching t2.micro instance of myuser/devtools-demo:0.0.1 (ami-ed936782) in prod (eu-central-1) ...
Instance launched in 00:24.954s -> i-ed279f50
Creating Cloud Watch Alarm for Instance auto-recovery -> i-ed279f50-auto-recovery-alarm
Waiting for AWS to boot Instance i-ed279f50 and Payload to start at https://52.59.240.195:8080/ ...
Payload started in 00:46.229s -> https://52.59.240.195:8080/
Remapping Elastic IP 52.59.61.93 to i-ed279f50 ...
Waiting 15s for AWS to complete Elastic IP Zero Downtime transition ...
Deployment completed successfully. myuser/devtools-demo:0.0.1 is up and running at https://devtoolsdemo-myuser.boxfuse.io:8080/
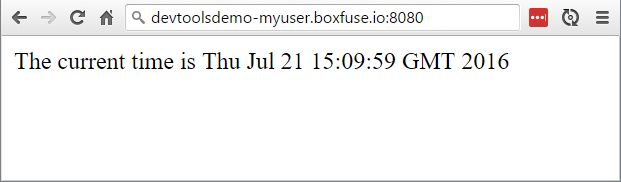
Make sure your application is up and running correctly on AWS:
Step 2: Live reloading classes and resources
Now that everything is up and running, let's set up live reloading. As described in the diagram above there are two types of reloading we must set up for everything to work smoothly:
- automatic reloading of classes and resources inside our AWS instance
- automatic reloading of the page in the browser
Let's focus on reloading of classes and resources first:
For reloading to be triggered whenever something changes in our IDE, we must start a local process to talk to our AWS instance.
While this sounds complicated, Spring Boot makes this absolutely trivial. Go to your IDE and create a new run configuration
for our devtools-demo project. And now instead of running our application itself, we'll simply run
org.springframework.boot.devtools.RemoteSpringApplication with one argument: the address where our application is deployed.
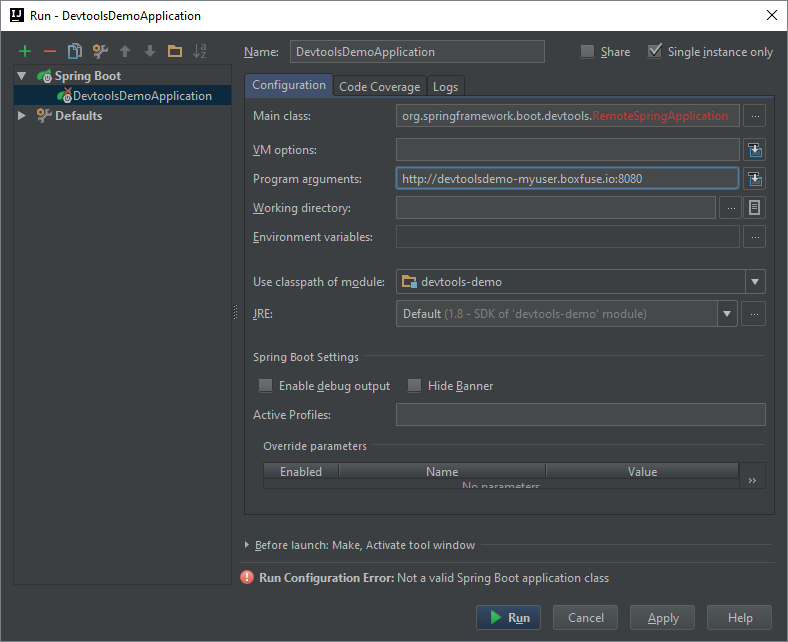
(IntelliJ users can safely ignore the bogus Run Configuration Error)
You should now see the RemoteApplication starting up and connecting with your instance:
  .   ____          _                                              __ _ _
 /\\ / ___'_ __ _ _(_)_ __  __ _          ___               _      \ \ \ \
( ( )\___ | '_ | '_| | '_ \/ _` |        | _ \___ _ __  ___| |_ ___ \ \ \ \
 \\/  ___)| |_)| | | | | || (_| []::::::[]   / -_) '  \/ _ \  _/ -_) ) ) ) )
  '  |____| .__|_| |_|_| |_\__, |        |_|_\___|_|_|_\___/\__\___|/ / / /
 =========|_|==============|___/===================================/_/_/_/
 :: Spring Boot Remote ::  (v1.4.0.RC1)

2016-07-21 17:35:42.861  INFO 4828 --- [           main] o.s.b.devtools.RemoteSpringApplication   : Starting RemoteSpringApplication v1.4.0.RC1 on axel-silencio with PID 4828
2016-07-21 17:35:42.861  INFO 4828 --- [           main] o.s.b.devtools.RemoteSpringApplication   : No active profile set, falling back to default profiles: default
2016-07-21 17:35:42.893  INFO 4828 --- [           main] s.c.a.AnnotationConfigApplicationContext : Refreshing org.springframework.context.annotation.AnnotationConfigApplicationContext@16ec5519: startup date [Thu Jul 21 17:35:42 CEST 2016]; root of context hierarchy
2016-07-21 17:35:43.209  WARN 4828 --- [           main] o.s.b.d.r.c.RemoteClientConfiguration    : The connection to https://devtoolsdemo-myuser.boxfuse.io:8080 is insecure. You should use a URL starting with 'https://'.
2016-07-21 17:35:43.262  INFO 4828 --- [           main] o.s.b.d.a.OptionalLiveReloadServer       : LiveReload server is running on port 35729
2016-07-21 17:35:43.278  INFO 4828 --- [           main] o.s.b.devtools.RemoteSpringApplication   : Started RemoteSpringApplication in 0.755 seconds (JVM running for 1.058)
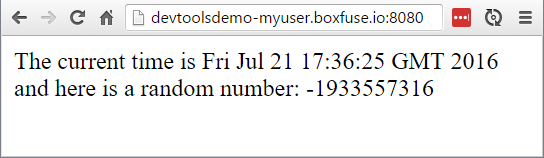
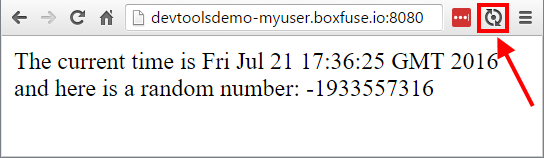
Now change the currentTime() method to:
@RequestMapping(method = RequestMethod.GET, path = "/")
@ResponseBody
public String currentTime() {
    return "The current time is " + new Date()
            + " and here is a random number: " + new Random().nextInt();
}
After saving and compiling in your IDE you'll see the following line in the output of the RemoteApplication:
2016-07-21 17:36:10.119 INFO 3268 --- [pool-1-thread-1] o.s.b.d.r.c.DelayedLiveReloadTrigger : Remote server has changed, triggering LiveReload
And you'll see the changes in your browser after refreshing the page:
Step 3: Automatic reloading of the page in the browser
The setup we now have will instantly reload any changes to our application. It does however still require us to manually refresh the browser window to see the changes. Let's fix that!
We're going to do this using LiveReload. There are two parts to this: a browser extension that reloads the current page and a server that notifies it when it should do so.
As some of you may have noticed from the output when you started the RemoteApplication, the Spring Boot DevTools actually
automatically start a LiveReload server by default:
2016-07-21 17:35:43.262 INFO 4828 --- [ main] o.s.b.d.a.OptionalLiveReloadServer : LiveReload server is running on port 35729
This means that all we actually need now is to download and install the LiveReload browser extension.
Once you have done that, activate the extension with a click:
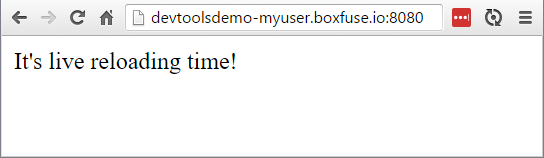
And if you now change the currentTime() method to:
@RequestMapping(method = RequestMethod.GET, path = "/")
@ResponseBody
public String currentTime() {
    return "It's live reloading time!";
}
After you save and compile, the browser pointed at your Spring Boot app running on AWS will now automatically refresh to show the changes:
Summary
It is great to be able to iterate quickly in a production-like environment. We saw how easy it is to do so using one of Spring Boot's best kept secrets: the Spring Boot DevTools.
They bring the productivity of local development directly to remote deployments running on AWS or the environment of your choice. And if you add the LiveReload browser extension you won't even need to refresh to see the changes!
So go ahead, set the DevTools up, have fun and start Live Reloading your Spring Boot apps on AWS in minutes!
Shameless plug: To deploy your Spring Boot applications effortlessly to AWS, simply log in to CloudCaptain with your GitHub account and you'll be up and running in no time. With just a single command all required AWS resources will be provisioned, configured and secured for you, and all updates are performed as zero-downtime blue/green deployments using Immutable Infrastructure.